5.03.2011

Details of Paper

Here is a closer look at the pulp that creates the paper...These images are taken from the sheets created on 04.30.11...


A Tour of My Studio...

This is where I conceptualize and develop my art...

yes, they have a nest across the way...the babies will be born sometime this summer


a spontaneous collage, created from scraps...also, some plum and ambrosia tea


today was a tiring paper session

The Results Are In!

Well, it worked! I was able to successfully separate the sheets of paper from the gouch sheets they were pressed onto. Although it took a few minutes per sheets, I was thoroughly pleased with the results! Believe it or not, I was actually able to create even thinner sheets than before. In addition, I think I may have discovered a convenient way to create silhouettes.

Here are my latest sheets of paper, dried, and ready to be used:

paper on gouch sheets, Gonzo on the paper
sheets of paper lined up


Gonzo might love paper more than me!


it's amazing what drops of water can do...

the effect of silhouettes


now THIS is so thin paper!

5.01.2011

More Than Just the Last Day of April...


Working at RedLine Studio has become a weekly occurrence for me. Some weeks are spent beating pulp, while others are used as a challenge to create as many sheets as I can. Needless to say, I have found my rhythm. Or so I thought...

Yesterday was the last day of April, a beautiful Saturday, and my biggest "off" day for papermaking. At first, I thought that it wasn't too big of a deal that I woke up late. My goal was to leave my apartment at 9:30am. Instead, I woke up at 9:30am. My thoughts immediately spiraled into questioning whether to walk (which I have do EVERY other time), or, to take the bus...The walk is only 1.5 miles, and I can do it in 20 minutes. The issue, however, is that the studio time stated at 10am and goes until 1pm. Since I would not be able to leave until 10am, I decided that I would rather spend more time in the studio than to stick to my routine walk. I took the bus.

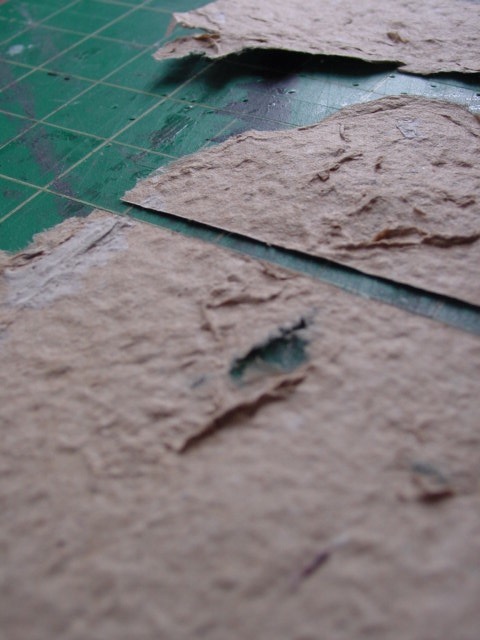
I cannot explain the feeling of walking into the paper studio...EXCITEMENT! I put on the rubber apron, prepared my bucket for rehydrating pulp I had made the week before, watered the vat, and set out the wood slabs and gouch sheets. READY! I was moving and grooving while listening, and signing along, to my country music iPod mix. In fact, I was feeling the mood so much that I had gone through more than half the bucket of pulp. After moving the sheets to the press, I checked my time and discovered that only 45 minutes had expired. Since it takes me about 45 minutes to clean up, there was no reason I wouldn't be able to get through most all of the pulp (which would be the first time this semester!). Once pressed, I moved the sheets to a dry table where I would prepare them for transport back to my apartment. The first sheet I tried to peel from the gouch sheet was not working. No matter how much I worked the corners, or moved slowly, the paper was tearing apart with enormous amounts of ease. My first thought was that this particular sheet wasn't even the thinnest, which was not a good sign for the rest of the batch. My second thought was that this batch of pulp did not receive the correct amount of methyl cellulose (a powder that you add to the pulp, giving it a glue-like effect). Before attempting to peel each sheet I had just made, I decided to add methyl cellulose to the remaining pulp. Then, I cleaned the entire area because I was done for the day. The remaining sheets have not moved from the gouch sheets since I made them yesterday. Perhaps leaving them on the gouch sheets overnight will give the fibers more time to bond together. After I publish this post, I will be attempting to remove the paper, and dry them out properly.

One of the biggest set-backs for artists is to realize that not every day will be brilliant. In fact, most days will have struggles that will inhibit the creative process. At the same time, these set-backs serve an educational function. For instance, I am still learning about proportion control when it comes to papermaking. On the plus side of these set-backs, artists are intuitive problem solvers. Therefore, we always find a quick fix...hopefully my overnight trick worked...

Today is May 1st, and another beautiful day at that! All we can do is keep working toward the end result. Let me tell ya, my end result is shaping up to be pretty fabulous!

4.28.2011

More Paper Art...


Check THIS Out!!!...

http://news.yahoo.com/nphotos/Simon-Schubert-folded-paper-artwork/ss/events/en/042611simonschuber/im:/ydownload/20110426/photos_net_web_en/1303860402/#photoViewer=/ydownload/20110426/photos_net_web_en/1303860402

I LOVE PAPER!

4.22.2011

Consistency Is Key

Fortunately I was able to make it into RedLine twice this week! My choice pulp, yet again, was browns...something about earth tones really excites me with this project. Interestingly though, my challenge was to maintain a certain level of consistency amongst each sheet. In other words, I had to test the pulp for a desirable mixture, as well as ensuring that each sheet created was identical in thickness. All I have to say is that I am getting better with practice.

Since my project has reached the state of construction, I have begun creating the foundation of each broadside...the dimensions will be 5'X11". However, RedLine's papermaking studio is limited when it comes to vats, screens, and presses. That means I have been creating the largest sheets available: 11"X14". Because I will ultimately be connecting these sheets lengthwise to establish the 5', consistency will be very important.

On the illustrative front, I have been collecting reference photos to help develop storyboards. Once my sketches and narrative become finalized, I will be ready to initiate collaging. This is a very exciting time for me, seeing as how I am enamored with process!


4.15.2011

On My Way...

Well, Saturday is the big day! I will FINALLY begin creating the foundation of my broadside(s). As you can see in the images below, my brown pulp will serve as a great option for the base; it is neutral, bold, and highly complementary of any add-ons I choose to create. Add-ons will include, and are not limited to: tree moldings, dangling paper owls, and layers of extra thin papers with inverted silhouettes. The trick is going to be connecting each sheet of paper so that I end up with a broadside that is 10 feet long, 11 inches high, OR, 5 feet long, 11 inches high. I am still torn between creating one large broadside, OR, a few shorter broadsides, that would display in a stacked fashion. But for now, my focus is to create a consistent and uniform grouping of paper.

These are the top 15 examples of the papers I have been making these past two weeks:

brown and cotton mix, lamination, after 10 minutes
brown and cotton mix, painted additions, after 5 minutes


brown mix, after 15 minutes
brown mix, after 10 minutes


brown and cotton mix, embossing, after 20 minutes
brown mix, splattered with cotton, after 15 minutes


brown mix, after 30+ minutes
brown and sand mix, after 20 minutes


cotton and brown mix, after 20 minutes
cotton and brown mix, after 30 minutes


extra thin, text weight mix

text weight mix, after 10 minutes


lamination
extra thin, text weight mix


lamination


4.14.2011

Take A Close Look...

THIS is inspiration!...Yes, Yes, and Yes!!!

http://www.youtube.com/watch?v=sNlwh8vT2NU&feature=relmfu

Glad to know that I am headed in a VERY inspiring direction:)...

4.12.2011

Book Arts?...What's That?...

Check out this couple who are taking the nation by storm, exposing communities to what Artist's Books are!!!...


http://indianapublicmedia.org/arts/wandering-book-artists-bloomington/

3.27.2011

What do you get when you cross baking and recycling?

Well, today was the big day! Paper-making intro/orientation, followed by 3 hours of studio time, and 18 sheets of paper. The space was very intimate, and yet did not feel enclosed. I was also struck by the amount of recycled materials used in the paper-making process. For instance, I spent most of my scooping time with a Stonyfield Farms yogurt container; I am referring to scooping up the pulp, and pouring it into the muck bucket (pictured below).

Between Dara's orientation and studio time, my overall concept has begun coming full-circle. Outrageously large broadsides anyone? Paper offers an unlimited amount of possibilities. For instance, laminating was my favorite technique that Dara explained. First, you create one sheet of paper, laying it out on the couch. Next, place ribbon, string, flower petals, etc. onto the paper. Finally, create another sheet of paper, using it to sandwich the materials placed on top of the bottom sheet. Once dry, the paper embodies more than just pulp. What is so special about this process? Consider for a moment that I am attempting to, at some capacity, incorporate 3D and 4D elements. Laminating could be exploited in the cross-section between the second and third dimension. Instead of hanging Barred Owls from the ceiling, I can scale down, and have the Barred Owls extend from the broadside via wire; the wire would be hidden and stabilized by the sandwiching of paper fibers. In addition, hand-made paper offers unique characteristics that will cater to letter-pressing my voice.

As of now, my project has evolved into a culmination of 2D, 3D, and 4D, with a strong emphasis on the broadside (2D) itself. Ladies and gentlemen, are you ready for paper? Ready or not, here it comes!

Here is a bit of documentation from my studio time today:

 The muck bucket...Each piece fits into the other...
 Top: Brown paper pulp = newspaper, paper bags, vellum, and wax paper; Bottom: White cotton fibers, from a fashion design/textile mill...the portion of fabric that is not usable

Couches hanging to dry...
 The Press: squeezed out the water, presses the pulp together until it adheres and the fibers interlock...
 Pile of 17 hand-made papers...#18 was created using the "pour" method, and is drying via open air...
 The "pour" method of paper-making...

 The "pour" method, continued...

3.24.2011

Attempt #3

Decided to change up my medium this time. In addition to my myriad plastic bags, I also have quite a collection of cardboard. This method would need to be a lot more calculated in order for edges to line up properly. Although I did not add the small detailing, my vision was to cover the owls in elaborate/decorative cardboard details. What you see here are the "bone structure" or the owls, which do appear boxy. Out of the three, this was most successful. However, re-visiting the concept is not unreasonable.